mail_outline sales@mediastorehouse.com
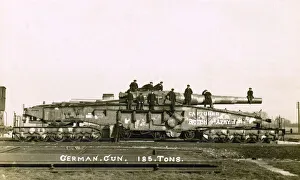
German Railway gun captured at the Battle of Amiens - WW1A huge German Railway gun captured at the Battle of Amiens on 8th August 1918 became a source of some Allied controversy. The Australian 31st Battalion effected its capture, but
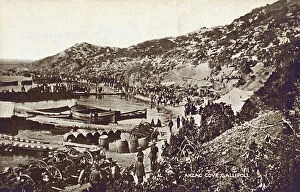
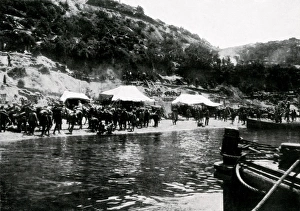
Anzac Cove, Gallipoli, Dardanelles - WW2 - Landing suppliesAnzac Cove, Gallipoli Peninsula, Turkey, Dardanelles - WW2 - Landing supplies - view looking towards ArAnburnu, 1915 Date: 1915
Caricature of a cheeky Australian solder - WW1circa 1916
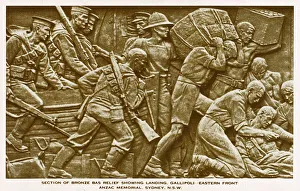
Bas relief from the Anzac Memorial - Sydney, AustraliaBronze Bas relief from the Anzac War Memorial by Rayner Hoff - Hyde Park, Sydney, Australia - showing the landing of troops at Gallipoli, Dardanelles Front, WW1. Date: circa 1934
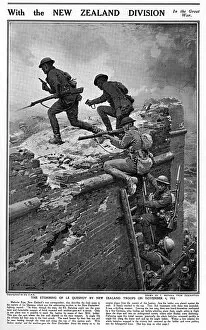
Storming of Le Quesnoy by New Zealand troops, 1918, MataniaThe storming of Le Quesnoy by New Zealand troops on 4 November 1918. The soldiers, led by two second lieutenants, the men climbed up a ladder against the ramparts
Australian soldiers at Gallipoli WWIAustralian soldiers at Anzac, Gallipoli during World War I
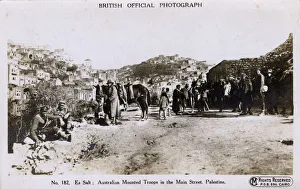
WW1 - Jordan - Australian Mounted Troops at Es SaltWW1 - Middle East - Australian Mounted Troops on the Main Street at Es Salt (now Al-Salt), Jordan. Es Salt, was 15 miles north east from the Ghoraniyeh crossing of the Jordan River and 4
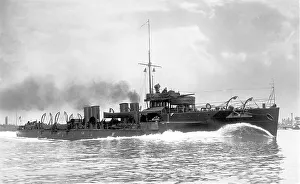
HMS Usk - a Yarrow-type River-Class destroyerRoyal Navy - HMS Usk, a Yarrow-type River-Class destroyer ordered under the 1901 - 1902 Naval Estimates and named after the River Usk in Wales flowing through Newport
Funeral of Anzac soldier, Western Front, WW1Funeral of an Anzac soldier on the Western Front during World War One. Date: circa 1916
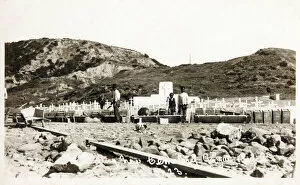
Chanakkale (Chanak, formerly Dardanellia ) on the Turkish Dardanelles coast (Gallipoli Peninsula) - building the New Anzac Cemetery Date: circa 1920s
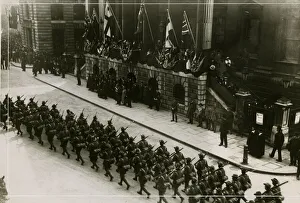
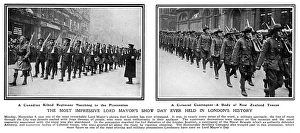
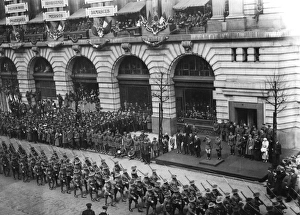
Anzac Day march past the Mansion House, LondonAnzac Day march past the Mansion House, City of London, 25 April 1919. 1919
Christmas Greetings - Australian War Contingent AssociationChristmas Greetings from the Australian War Contingent Association - London, 1916. The group sent out gift boxes to Australian servicemen in action abroad, along with these cards. Date: 1916
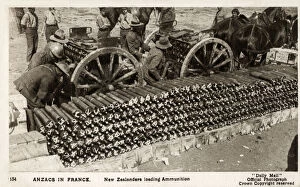
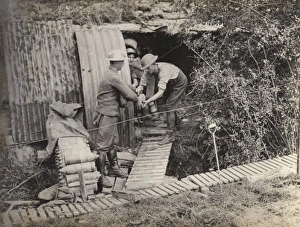
WW1 - New Zealand Anzac Troops loading ammunition, France. Date: circa 1916
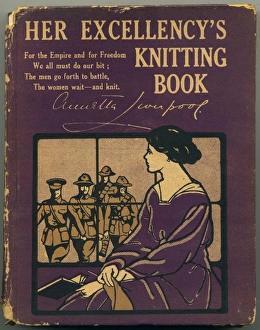
Her Excellencys Knitting Book, WW1Front cover of Her Excellencys Knitting Book, a book of patterns for knitting comforts for troops during the First World War
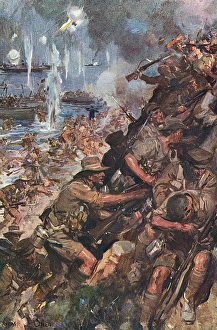
Landing at Gallipoli, World War I by Cyrus CuneoAnzac soldiers landing on the beach at Gallipoli and coming under fire by Turkish troops. Date: 1916
First convoy of ships leaving Albany, Australia, WW1The first convoy of ships leaving Albany, Western Australia, during the First World War. They were carrying Australian and New Zealand troops (later known as Anzacs)
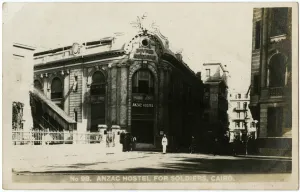
Anzac Hostel for soldiers, Cairo, EgyptThe Bourse Khediviale (Royal Exchange) in Cairo, Egypt - used as a Hostel for Australasian Troops (Anzac) fighting in WW1
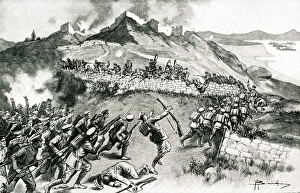
WW1 - Anzacs fighting near the Krithia heights, GallipoliWW1 - The Anzac troops gain fresh ground in Gallipoli as they storm the enemys line near the Krithia heights. The soldiers fight among the ridges of the road to Constantipole. Date: 1915
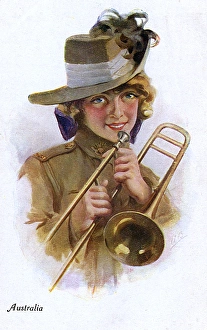
WW1 - Girl with Trombone in Australian Military Uniform. Date: circa 1918
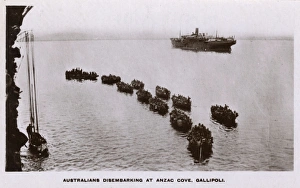
WW1 - Australians disembarking at Anzac Cove, Gallipoli on Sunday, 25th April 1915. Date: 1915
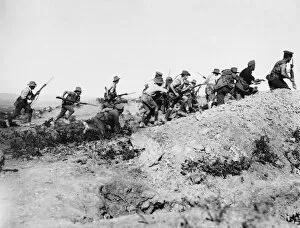
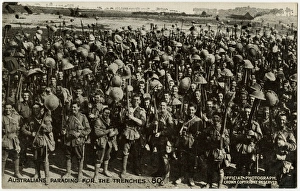
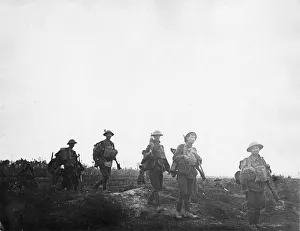
WW1 - Australian Troops who captured Pozieres shortly after midnight on Sunday, July 23rd, 1916 with a " splendidly dashing" advance through shrapnel and machine gun fire. Date: 1916
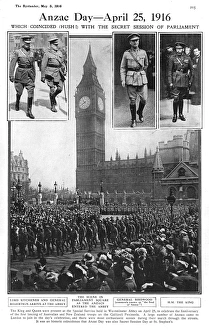
Anniversary of the fist landing of the Anzacs at GallipoliCelebration in Parliament Square of the anniversary of the first landing of the Australian and New Zealand Army Corps (Anzac) on the Gallipoli Peninsula. 1916
Victory March, London - Australian Troops, Constitution HillVictory March, London on 3rd May 1919 - Australian Troops on Constitution Hill. Date: 1919
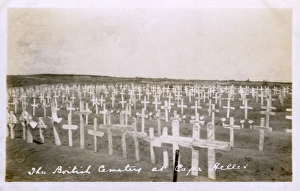
The British Cemetery at Cape Helles, Dardanelles. Date: 1923
WW1 - Australian and New Zealand Army Corps in GallipolliWW1 - The Australian and New Zealand Army Corps (ANZAC), was a First World War army corps of the Mediterranean Expeditionary Force that was formed in Egypt in 1915
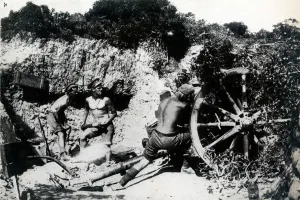
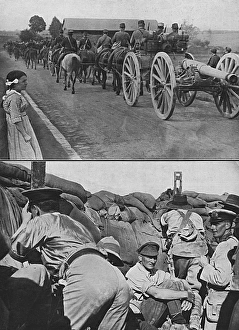
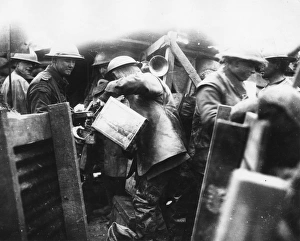
WW1 - Australian Gunners in Gallipoli, 1916WW1 - Four Australian Gunners from the ANZAC Corps in action at their base in Gallipoli. The gunners working topless in the heat as they prepare their ammunition for their weapons as a team
WW1 - Night attack by the Turks on the Anzacs at GallipoliWW1 - The Battle of Chunuk Bair - Fought between the Ottoman defenders and troops of the British Empire. At the cliff faces at Gaba Tepe, the Turks attack the Australian lines at night
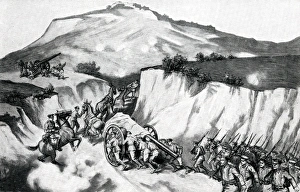
WW1 - Battle of Sari Bair - Heavy artillery advancementWW1 - Battle of Sari Bair - The main operation started on 6th August 1915, with the intention of gaining a fresh landing north of Anzac at Suvla Bay
Lord Mayors Show, 1914Two photographs published in The Sphere magazine reporting on the Lord Mayors Show, held on 9 November 1914 when Britain had already been at war for two months
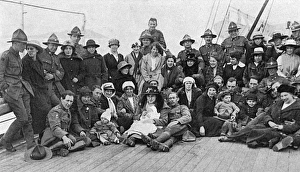
New Zealand soldiers returning home with English brides, WW1A party of New Zealand soldiers on board the Remuera, heading home accompanied by their English wives who they had met and married while in Britain
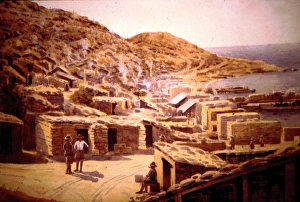
Anzac Cove, Gallipoli, 1915, by Captain G Drummond-Fish (Royal Irish Rifles). Date: 1915
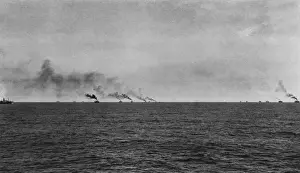
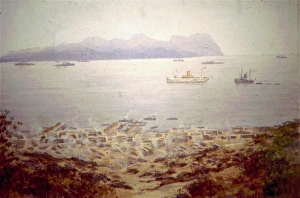
Anzac Bay, Troopships and Stores, Mudros in the distance, by Captain G Drummond-Fish (Royal Irish Rifles)
A Australian trench at the DardanellesThe periscope in use in an Australian trench at the Dardanelles. Date: 1915
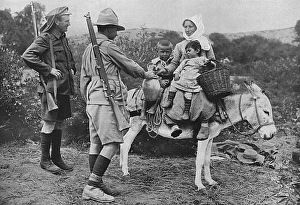
Australian soldiers giving water to local children, DardanelAustralian soldiers pictured offering water to country children during the Dardanelles campaign of 1915. Date: 1915
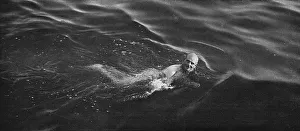
General Birdwood swimming in the sea at the DardanellesField Marshal William Riddell Birdwood, 1st Baron Birdwood (1865-1951), British Army General best know for his command of the Australian and New Zealand Army Corps (ANZAC)
ANZAC Day in London, 25th April 1919Anzacs march through London on Anzac Day, 25th April 1919. 25th April was officially named as ANZAC (Australian and New Zealand Army Corps) Day in 1916
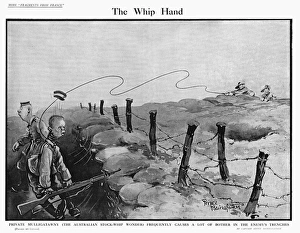
The Whip Hand, by BairnsfatherThe Whip Hand Private Mulligatawny (the Australian stock-whip wonder) frequently causes a lot of bother in the enemys trenches Bruce Bairnsfathers " stock whip" cartoon sums up
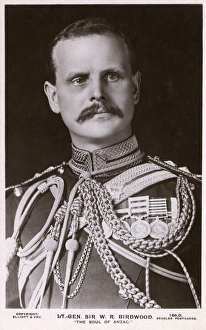
Field Marshal William Riddell Birdwood, 1st Baron Birdwood (1865-1951) - " The Soul of Anzac" - Commander of the Australian and New Zealand Army Corps during the Gallipoli Campaign (WW1)
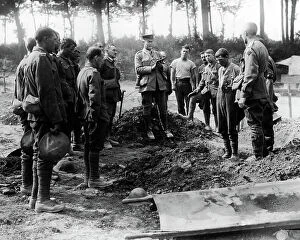
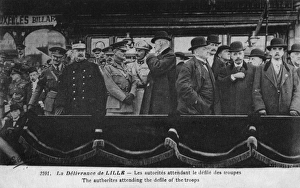
Authorities attending the defile of the troops - LilleAuthorities attending the defile of the troops - Parade at Lille, France - October, 1918. The unmistakable chin of Liberator Field Marshal William Riddell Birdwood
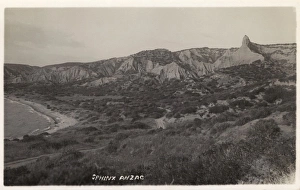
The Sphinx - Anzac BeachKnown to the Turks as Yuksek Tepe - High Hill - and known to the troops as The Sphinx, this rocky feature dominates the Anzac landing beaches on the west coast of the peninsula
New Zealand howitzer battery moving shells, WW1Men of a New Zealand howitzer battery moving a supply of shells during the First World War. Date: 1914-1918
Australian troops near Clery, France, WW1Men of the 32nd Australian Battalion crossing north of the Somme near Clery, northern France, for operations against Mont St Quentin towards the end of the First World War. Date: 31 August 1918
Hot coffee served to ANZAC troops on front line, WW1Hot coffee being served to ANZAC troops on the front line during the First World War. Date: 1916
New Zealand troops on road to Gaza, Palestine, WW1New Zealand troops on horseback on the road to Gaza, Palestine, during the First World War. Date: circa 1917
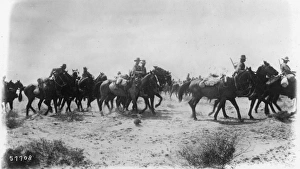
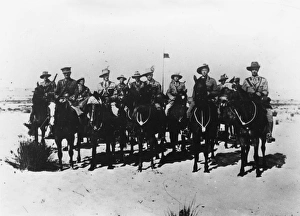
ANZAC Mounted Division in Egypt with GOC, WW1The ANZAC Mounted Division in Egypt, with GOC (General Officer Commanding), during the First World War. Date: 1914-1918
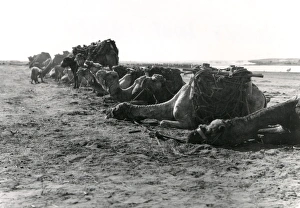
Anzac transport camels resting at Gaza, WW1Transport camels of the Anzac section of the Imperial Camel Corps resting at Gaza during the First World War. Date: circa 1917
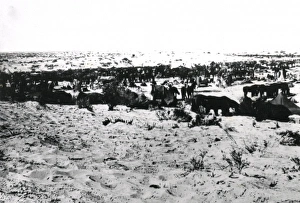
5th Light Horse Regiment camp near Gaza, WW1Camp of the Australian 5th Light Horse Regiment on the sand near Gaza during the First World War. Date: 1917
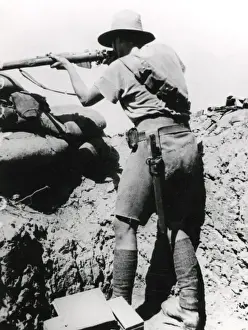
Australian soldier near Gaza, WW1An Australian soldier taking aim with his rifle near Gaza during the First World War. Date: circa 1917