mail_outline sales@mediastorehouse.com
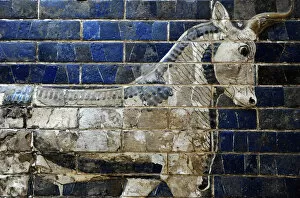
Decoration with aurochs and dragons in the Ishtar Gate. 6thIshtar Gate. Babylon. 575 BC. Decoration with aurochs and dragons. Archaeological Museum. Museum of Ancient Orient. Istanbul. Turkey
Stele with inscription and relief of the governor Shamsh-resStele with inscription and relief of Shamsh-res-usur, governor of Mari and Suhi, praying in front of the Gods. 8th century BC. Limestone. Palace Museum of Babylon. Archaeological Museum
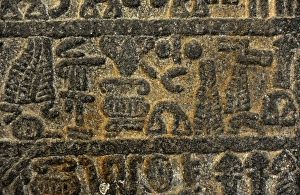
Hitite slabs with hieroglyphic inscription about the activitSlabs with hieroglyphic inscription about the activities of King Urhilina and his son. Detail. Basalt. Late Hitite Period. 9th century BC. From Hama (Syria). Archaeological Museum
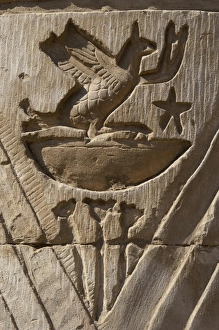
Egyptian Art. Temple of Kom Ombo. Bird. ReliefEgyptian Art. Temple of Kom Ombo. Ptolemaic Dynasty. 2nd century B.C. Dedicated to the crocodile god Sobek and falcon god Haroeris. Bird. Relief
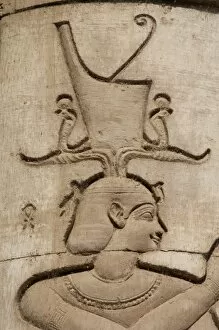
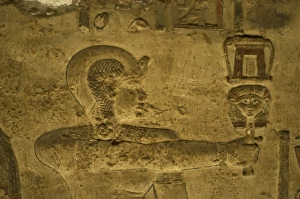
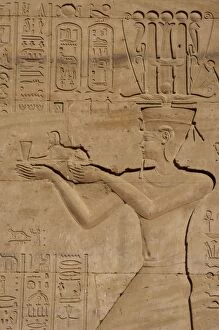
Egyptian Art. Temple of Kom Ombo. Pharaoh offering wearing REgyptian Art. Temple of Kom Ombo. Ptolemaic Dynasty. 2nd century B.C. Dedicated to the crocodile god Sobek and falcon god Haroeris. Pharaoh offering wearing Red Crown. Relief
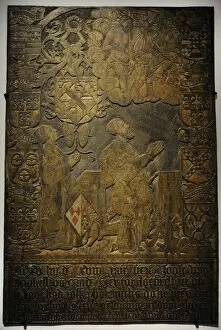
Tombstone with family Mijnden Van Amstel. Holland. 1550. Museum Catharijneconvent. Utrecht. The Renaissance
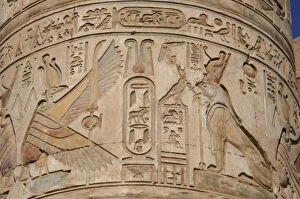
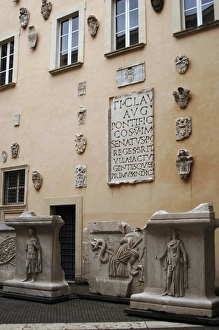
Egyptian Art. Temple of Kom Ombo. Royal cartridge of the RomEgyptian Art. Temple of Kom Ombo. Ptolemaic Dynasty. 2nd century B.C. Dedicated to the crocodile god Sobek and falcon god Haroeris. Royal cartridge of the Roman Emperor Tiberius. Relief
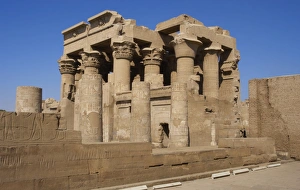
Egyptian Art. Temple of Kom Ombo. Papyrus columnsEgyptian Art. Temple of Kom Ombo. Ptolemaic Dynasty. 2nd century B.C. Dedicated to the crocodile god Sobek and falcon god Haroeris. Papyrus columns. Outside view
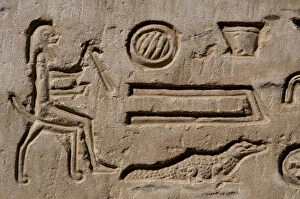
Egyptian Art. Temple of Kom Ombo. Hieroglyphic symbols and cEgyptian Art. Temple of Kom Ombo. Ptolemaic Dynasty. 2nd century B.C. Dedicated to the crocodile god Sobek and falcon god Haroeris. Hieroglyphic symbols and crocodile. Relief
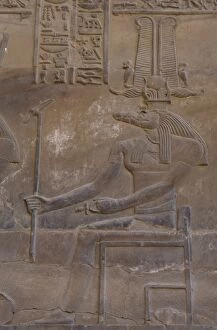
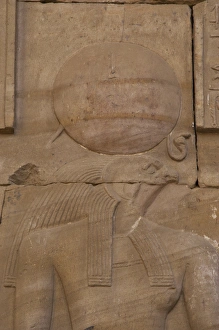
Egyptian Art. Temple of Kom Ombo. The god Sobek wearing shutEgyptian Art. Temple of Kom Ombo. Ptolemaic Dynasty. 2nd century B.C. Dedicated to the crocodile god Sobek and falcon god Haroeris. Relief depicting the god Sobek wearing shuty crown
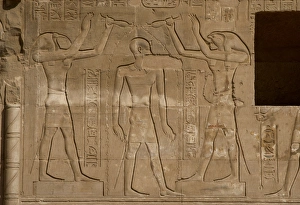
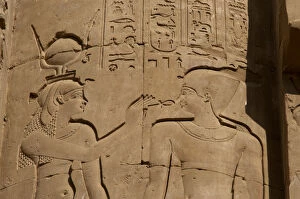
Egyptian Art. Temple of Kom Ombo. Toth and Horus give sacredEgyptian Art. Temple of Kom Ombo. Ptolemaic Dynasty. 2nd century B.C. Dedicated to the crocodile god Sobek and falcon god Haroeris. Purification
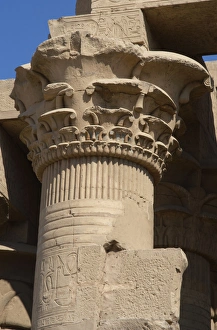
Egyptian Art. Temple of Kom Ombo. Papyrus columnEgyptian Art. Temple of Kom Ombo. Ptolemaic Dynasty. 2nd century B.C. Dedicated to the crocodile god Sobek and falcon god Haroeris. Papyrus column. Detail
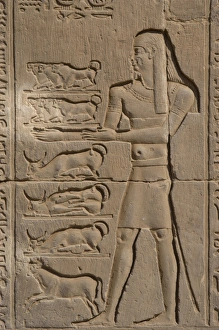
Egyptian Art. Temple of Kom Ombo. Offerer. ReliefEgyptian Art. Temple of Kom Ombo. Ptolemaic Dynasty. 2nd century B.C. Dedicated to the crocodile god Sobek and falcon god Haroeris. Offerer. Relief
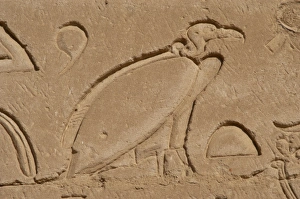
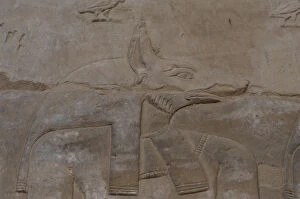
Egypt. Edfu. Temple of Horus. Vulture. ReliefEgypt. Edfu. Temple of Horus. 3rd century B.C. Vulture. Relief
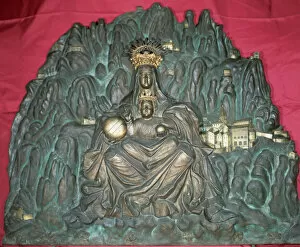
Virgin of Montserrat and the Mountain. 18th. century. GildedVirgin of Montserrat and the Mountain. Second half of 18th century. Gilded bronze. Diocesan Museum of Barcelona. Catalonia. Spain
Egyptian Art. Dendera. Temple of Hathor. Deity in procession. Relief
Egyptian Art. Dendera. Hathor Temple. The god Ihy holding aEgyptian Art. Dendera. Hathor Temple. Relief depicting the god Ihy holding a sistrum in his hand
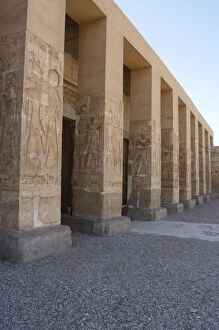
Egyptian Art. Temple of Seti I at Abydos. Facade. Detail. Pillars decorated with reliefs.19th Dynasty. New Kingdom
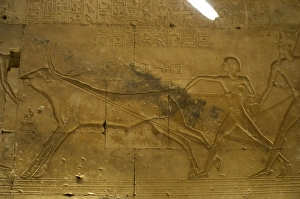
Egyptian Art. Temple of Seti I at Abydos. The pharaoh RamessEgyptian Art. Temple of Seti I at Abydos. Relief depicting the pharaoh Ramesses II lassoing a bull with his father Seti I behind him. 19th Dynasty. New Kingdom
Egypt. Temple of Horus. Relief depicting a sphinx with falcoEgypt. Edfu. Temple of Horus. Relief depicting a sphinx with falcon head and double crown of lotus flowers and goddess Nekhbet with vulture form over lotus flowers
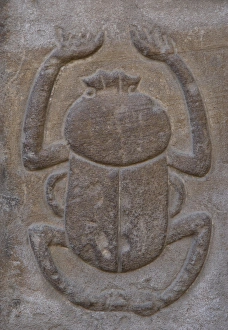
Egypt. Temple of Horus. Relief depicting a beetle. EdfuEgypt. Edfu. Temple of Horus. Relief with hieroglyphic representation of a beetle. Lagide or Ptolemaic Dynasty
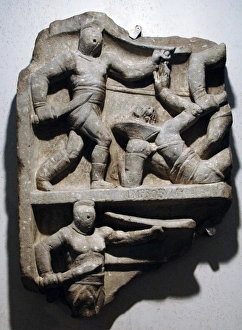
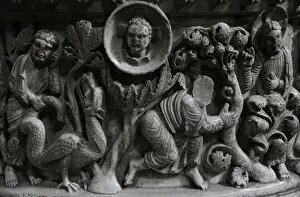
Commemorative relief of an unknown gladiators ventures, porFragment of a commemorative relief of an unknown gladiators ventures, portrayed in several fights with his adversaries retiatii (gladiators who used the net and trident)
Egypt. Temple of Horus. Relief depicting God RaEgypt. Edfu. Temple of Horus. Relief depicting God Ra with falcon head and sun disk
Egypt. Temple of Horus. Relief depicting a Ptolemaic pharaohEgypt. Edfu. Temple of Horus. Relief depicting a Ptolemaic pharaoh offering to the gods a small sphinx
Egypt. Temple of Horus. Relief depicting an egyptian deity gEgypt. Edfu. Temple of Horus. Relief depicting an egyptian deity giving the key of life, ankh, to the Pharaoh
Egypt. Temple of Horus. Relief depicting the jackal-headed GEgypt. Edfu. Temple of Horus. Relief depicting the jackal-headed God Anubis
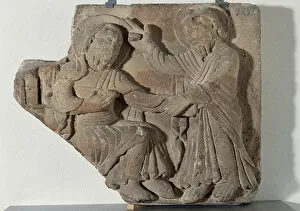
Christ blessing (Right) to St. Peter. (Left). Stone. ReliefRomanesque Art. Spain. Relief depicting a Christ blessing (Right) to St. Peter. (Left), 1160-1180). Stone. Episcopal Museum. Vic. Catalonia
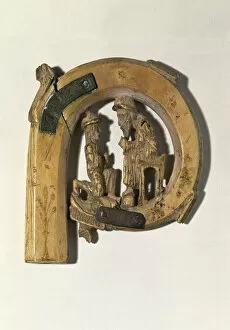
Croiser of Bishop Arnau de Jard?=? (1271-1306). Ivory. 13th century. Scene in relief of male figures. Tortosa Cathedral. Treasure. Catalonia. Spain
Moses and the Burning Bush. Baptismal font. 12th century. BaItaly. Lucca. Basilica of San Frediano. Baptismal font. Romanesque. 12th century. Reliefs depicting life of Moses. By Master Roberto. Moses and the Burning Bush
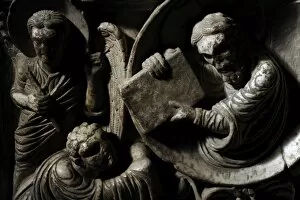
Moses receives the Law. Baptismal font. 12th century. BasiliItaly. Lucca. Basilica of San Frediano. Baptismal font. Romanesque. 12th century. Reliefs depicting the life of Moses. By Master Roberto. Moses receives the Ten Commandments from God on Mount Sinai
Baptismal font. 12th century. Basilica of San Frediano. LuccItaly. Lucca. Basilica of San Frediano. Baptismal font. Romanesque. 12th century. Reliefs depicting life of Moses. By Master Roberto. Detail of Soldiers Crossing the Red Sea
Ara Pacis Augustae. Aeneas sacrificing to the Penates. RelieRoman Art. Italy. Ara Pacis Augustae. Aeneas sacrificing to the Penates. Two young attendants in short tunics, with laurel wreaths
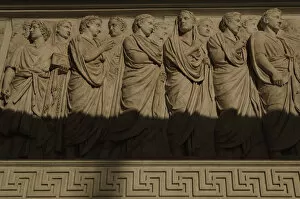
Ara Pacis Augustae. Processional frieze. Detail. Relief. NorRoman Art. Italy. Ara Pacis Augustae. Processional frieze. Detail. Relief. Original North side. Dated 13th century BC. Museum of the Ara Pacis. Rome. Italy
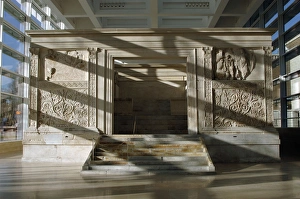
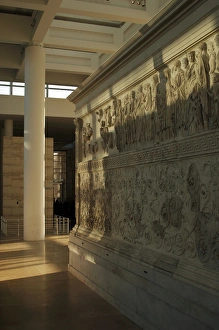
Rome. Ara Pacis AugustaeRoman Art. Italy. Ara Pacis Augustae. Altar dedicated to roman goddess Peace. Dated 13 BC. Museum of the Ara Pacis. Rome
Roman Art. Italy. Ara Pacis Augustae. Processional frieze and scrolling acanthus frieze. Relief. Original South side. Dated 13th century BC. Museum of the Ara Pacis. Rome. Italy
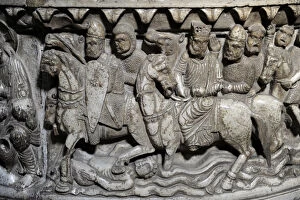
The Column of Marcus Aurelius. Piazza Colonna. Rome. ItalyThe Column of Marcus Aurelius. Roman victory Doric column featuring an spiral reliefs that depicts the vicotries of the Emperor against the Germans and Sarmatians. Completed by 193 A.C
Capitoline Museums. Exhibition. Rome. Italy
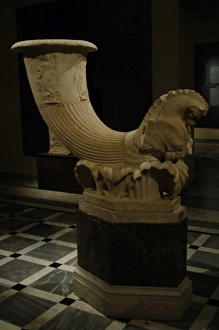
Fountain in the form of a horn-shaped drinking cup (rhyton)Roman Art. Fountain in the form of a horn-shaped drinking cup (rhyton) signed by Pontios Marble. Early Augustan period. 1st. century B.C. Pentelic marble. It comes from Rome. Capitoline Museums
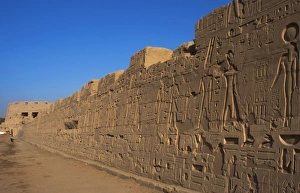
Egyptian Art. The Karnak Temple Complex. Wall with scenes of Pharaoh Ramesses II making offerings to the gods. 19th Dynasty. New Empire. Egypt
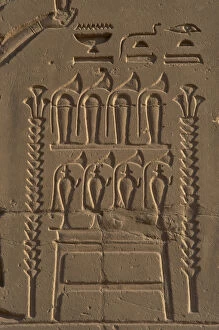
Egyptian Art. Karnak. Altar offerings with perfume bottles aEgyptian Art. The Karnak Temple Complex. Relief depicting an altar offerings with perfume bottles and papyrus flowers. 19th Dynasty. New Kingdom. Egypt
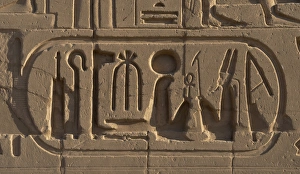
Egyptian Art. Royal protocol of Ramesses VI Nebmaatre-MeryamEgyptian Art. The Karnak Temple Complex. Hieroglyphic writing. Royal protocol of Ramesses VI Nebmaatre-Meryamun. He reigned from 1145 BC to 1137 BC. 20th Dynasty. New Empire. Egypt
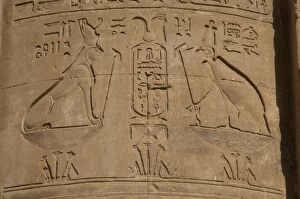
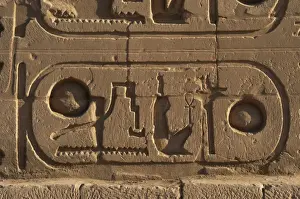
Egyptian Art. Royal protocol of Ramesses II. CartridgeEgyptian Art. The Karnak Temple Complex. Hieroglyphic writing. Royal protocol of Ramesses II. Fifth title of the Pharaoh: son of Ra.19th Dynasty (1320-1200 b.C.). New Empire. Egypt