mail_outline sales@mediastorehouse.com
British troops WWIBritish troops from the Royal Navy Division at Gallipoli during World War I
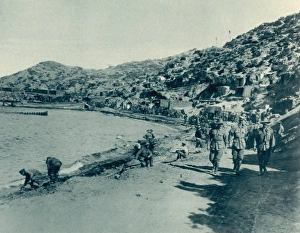
Anzac Cove WWIAnzac Cove at Gallipoli during World War I
Krithia Nulla in Gallipoli WWI6th Manchester Regiment in the Krithia Nulla sector at Gallipoli during World War I
Anzac evacuation WWIAnzac Cove evacuation from from Gallipoli during World War I
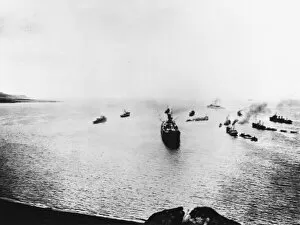
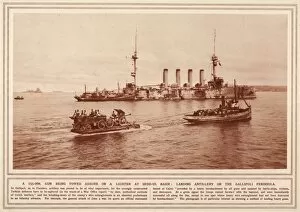
British and French Cruisers WWIBritish and French Cruisers of the entrance to the Dardanelles during World War I
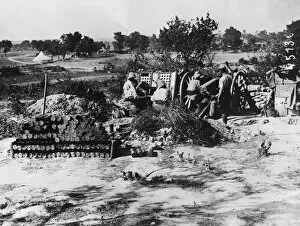
British artillery WWITwo British 60 pounder guns in position at Gallipoli during World War I
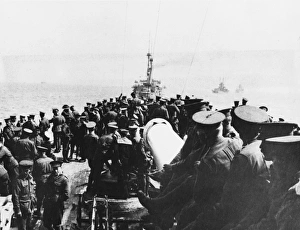
Australian troops WWIAustralian troops on board the British Battleship London going to the landing at Gallipoli during World War I
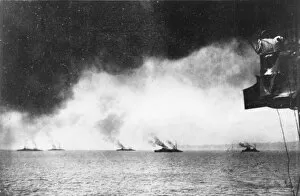
Dardanelles artillery WWIArtillery in action in the Dardanelles during World War I campaign in Gallipoli
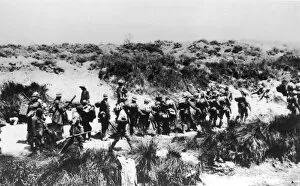
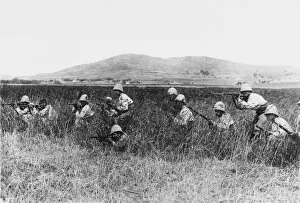
French soldiers at Gallipoli WWIFrench soldiers advancing in Gallipoli during World War I
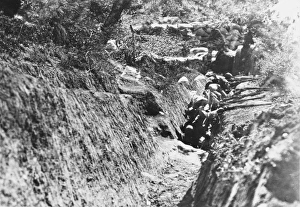
Turkish Trenches WWITurkish fire trenches during World War I
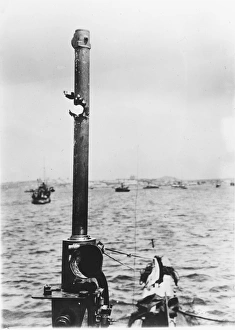
View from British Navy WWIA View from a damaged British submarine in the Dardanelles during World War I
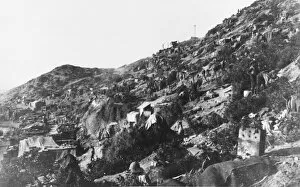
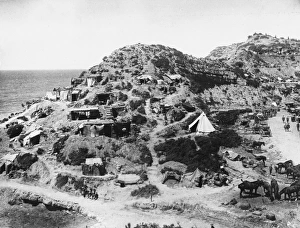
Gallipoli WWIEntrance to Gully ravine at Gully Beach where the 42nd East Lancashire Division was stationed during World War I
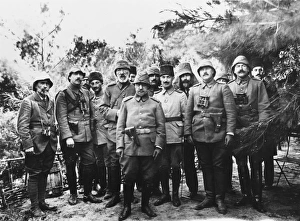
Turkish heir apparent WWIThe Turkish heir apparent and his staff posing in the Dardanelles during World War I
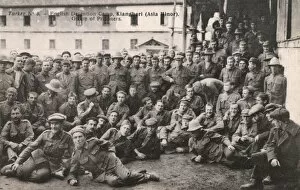
Turkish Prisoner of War Camp - WWITukish Prisoner of War ( Detention ) Camp at Kiangheri (Asia Minor) during the First World War, housing captured British and Colonial troops, captured during the Dardanelles Campaign
British Prisoners - Dardanelles - WW1British Prisoners captured by Turkish forces during the Dardanelles Campaign. A group of three officers
British Prisoners - Dardanelles - WW1British Prisoners captured by Turkish forces during the Dardanelles Campaign. A group of officers and privates seated on an open area in front of a group of Nissen huts
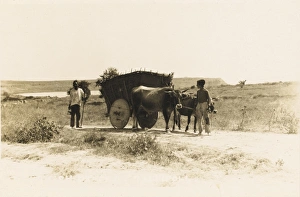
Turkish Ox Cart - GallipoliTurkish ox-cart - Gallipoli. Note the three-block solid wheels, a technology dating back to the earliest wheels depicted in relief carvings from the ancient near Eastern/Mesopotamian civilisations
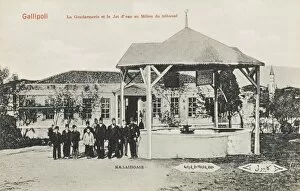
Gallipoli - Police HeadquartersFountain outside the Police Headquarters at Gallipoli
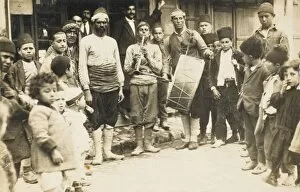
Street scene in CanakkaleScene in Canakkale (Gallipoli) in the Dardanelles during the British occupation with street musicians and a group of children (being entertained by their music)
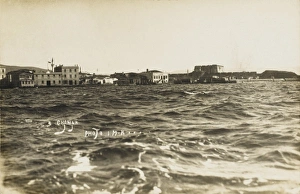
Chanakkale - View from the seaA View of Chanakkale from the sea
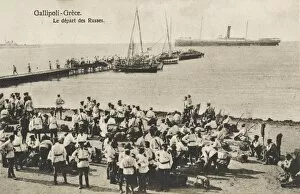
Departure of Russian troops from the Dardanelles - Gallipoli
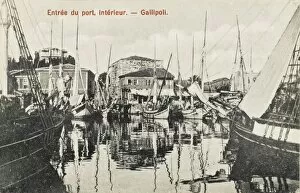
Inner Harbour - gallipoliThe entrance to the inner harbour at Gallipoli
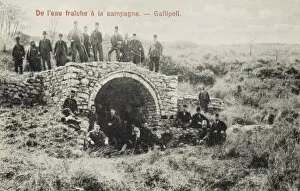
A fresh water spring in the countryside close to Gallipoli
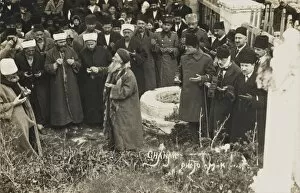
Chanakkale - Prayers being said near a well, with Imams, civilians and individuals in military uniform. One gentleman with a bandaged head holds a camera
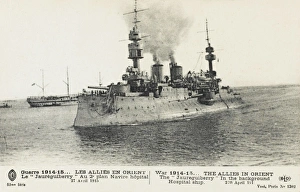
The French Warship Jaureguiberry - DardanellesFrench Pre-dreadnought Jaureguiberry - launched in 1893 - named after French Admiral Jaureguiberry. Fought in the Gallipoli campaign (pictures here) - struck in 1920 and broken up in 1934
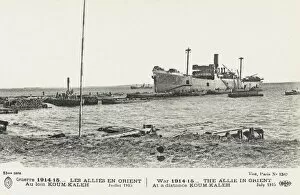
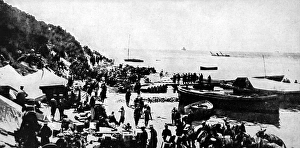
Allied force - DardanellesAllied forces unloading equipment and supplies at the Sed Dul-Bahr Fort. The inclined planes used for the first landing of forces here are visible
Supply ship - Sed Dul-Bahr, Dardanelles 1914Asiatic coast of the Dardanelles, following the landing of Allied forces. A French supply ship or troop carrier Cheval de Troie ( The Trojan Horse)
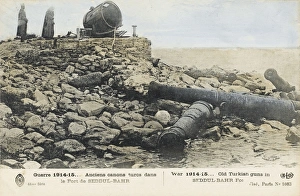
WWI - Dardanelles - Turkish gunsDardanelles, Turkey. Old Turkish Guns in Sed Dul-Bahr Fort
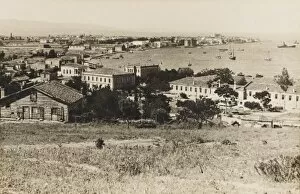
Chanakkale - TurkeyA view of Chanakkale, also known as Gallipoli, on the Turkish Dardanelles coast
British Soldiers at Muslim Burial - GallipoliA group of British and Australian allied forces at Gallipoli in the Dardanelles witness a Muslim burial conducted by the local Imam (possibly the burial of a local assistant to their cause?)
ANZAC Troops at Gallipoli - 1915The landing of Australian and New Zealand Troops (ANZAC) at Galipolli, Dardanelles, Turkey during World War One
Turkish fighter aircraft - WWITurkish fighter aircraft flying over the Dardanelles during the First World War
Landing artillery on the Gallipoli PeninsulaA 155-MM. gun being towed ashore on a lighter at Seddul Bahr on the Gallipoli Peninsula. The photograph is of particular interest as showing a method of landing heavy guns
General (Field Marshal) Birdwood / StampField Marshal WILLIAM RIDDELL BIRDWOOD, 1st Baron Birdwood (1865 - 1951) First World War British general. Commander of the Australian and New Zealand Army Corps (ANZAC)
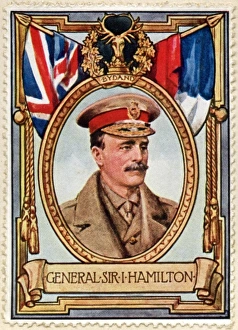
General Sir I Hamilton / StampGeneral SIR IAN STANDISH MONTEITH HAMILTON GCB GCMG DSO TD (1853 - 1947) British Army General and most notably known for commanding the ill-fated Mediterranean Expeditionary Force during the Battle
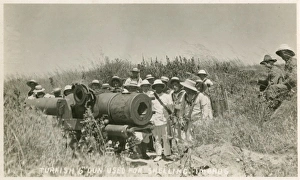
Australian Sailors visiting Gallipoli Sites - surrounding Turkish 6" gun used for shelling Imbros
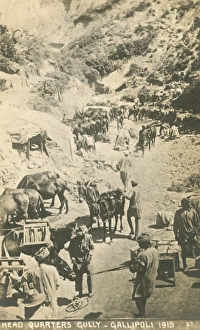
Indian (Commonwealth) troops at Gallipoli during the Dardanelles Campaign of 1915 - Headquarters Gully
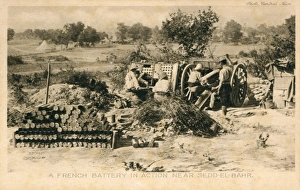
A French Battery in action near Sedd-el-BahrThis picture shows one of the guns of a French battery in action in the Gallipoli Peninsula. Throughout thr memorable landing opertaions the French troops rendered valuable assistance to the British
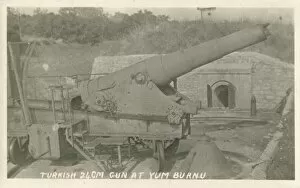
Captured Turkish 24cm gun gun at Yum Burnu
Disembarking in Mudros WWI5th Battalion Connaught Rangers disembarking the Clacton at Mudros before going to Gallipoli during World War I
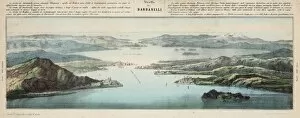
DardanellesSchematic view of the Dardanelles showing Gallipoli and looking towards Istanbul and the Black Sea : the strategic importance of the straits is clearly displayed
Stores arriving at GallipoliA war stores depot for an Australasian division, on the beach at Galllipoli. The Dardanelles campaign, the aim of which was to overpower Turkey, who had entered the war on Germanys side
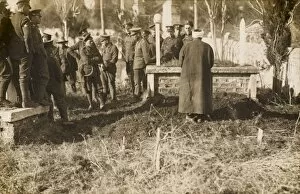
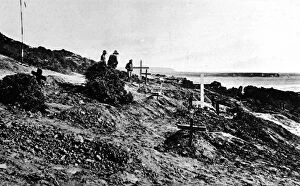
Cemetery for Australian officers at GallipoliA cemetery for Australian officers at Gallipoli. As part of the British Empire, Australians rushed to join up after the announcement of war in 1914. 8000 Australians lost their lives at Gallipoli
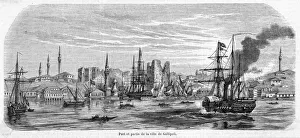
Turkey GallipoliGeneral view of the harbour at the time of the Crimea War
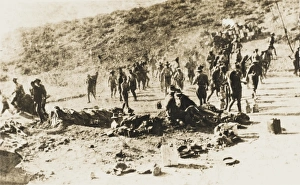
A view of Anzac Cove, west coast of GallipoliThis view shows Anzac Cove which was the base for the Australian and New Zealand troops at Gallipoli. Some of the fiercest fighting took place in this area. The soldiers are wearing slouch hats
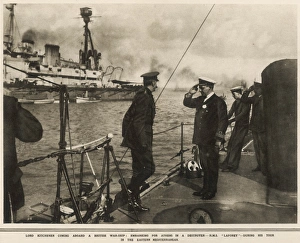
Lord Kitchener embarking for Athens aboard the Destroyer H. MLord Kitchener (1850-1916) boarding the Destroyer H.M.S. Laforey bound for Athens following his tour of the eastern Mediterranean in November 1915
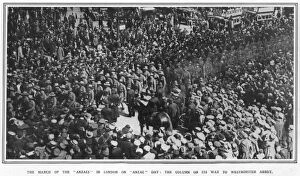
New Zealand troops marching to a memorial service in WestminA column of New Zealand troops marching to commemorate those who fell attempting to seize the Gallipoli peninsular during the First World War
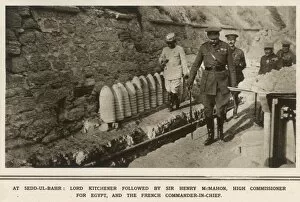
Lord Kitchener inspecting Allied positions at Sedd el-BahrLord Kitchener (1850-1916) inspecting Allied positions at Sedd el-Bahr on the southern tip of the Gallipoli peninsula in the eastern Mediterranean sea