mail_outline sales@mediastorehouse.com
Village at Humboldt Bay, Admiralty IslandsA photograph taken during the voyage of H.M.S. Challenger (1872-1876) funded by the British Government for scientific purposes
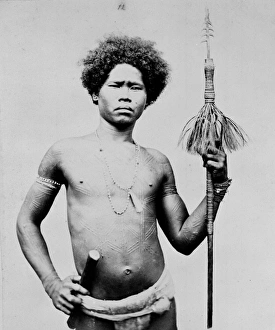
Admiralty Islander
Natives, Admiralty IslandsA photograph taken during the voyage of H.M.S. Challenger (1872-1876) funded by the British Government for scientific purposes
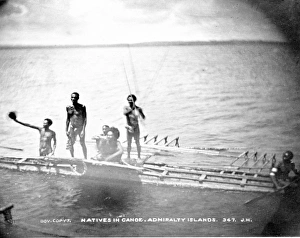
New Guinea natives in canoe, Humboldt Bay, Admiralty Islands
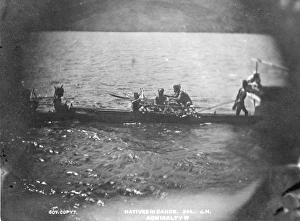
Natives in canoe, Humboldt Bay, Admiralty IslandsA photograph taken during the voyage of H.M.S. Challenger (1872-1876) funded by the British Government for scientific purposes
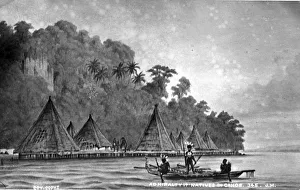
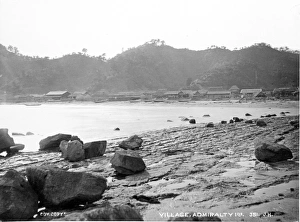
View across beach to village, Admiralty IslandsA photograph taken during the voyage of H.M.S. Challenger (1872-1876) funded by the British Government for scientific purposes
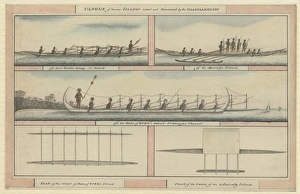
Canoes of various islands visited and discovered by the WaakCanoes from the Lord Howe Islands, the Admiralty Islands and the Duke of York Islands. Drawing number 29 from the George Raper Drawing Collection held within the Natural History Museum, London
Admiralty Pier, Dover, England. Date between ca. 1890 and ca. 1900
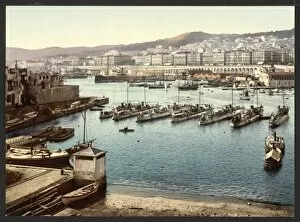
From the admiralty, Algiers, Algeria. Date ca. 1899
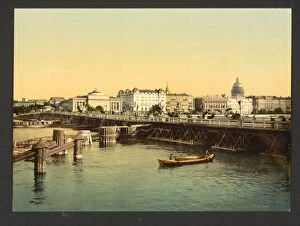
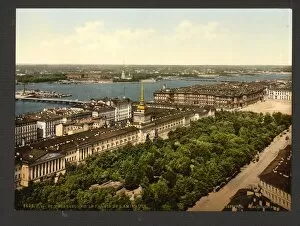
Dwortzowi (i. e. Dvortsovyi), Bridge and Admiralty Quay, StDwortzowi (i.e. Dvortsovyi), Bridge and Admiralty Quay, St. Petersburg, Russia. Date between ca. 1890 and ca. 1900
The harbour and admiralty, Algiers, Algeria. Date ca. 1899
The Newsky, (i. e. Nevskii), prospekt and the Admiralty, StThe Newsky, (i.e. Nevskii), prospekt and the Admiralty, St. Petersburg, Russia. Date between ca. 1890 and ca. 1900
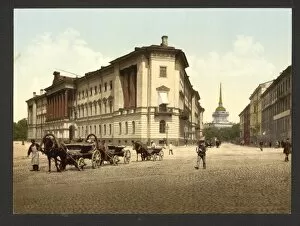
Admiralty and War Offices, St. Petersburg, Russia. Date between ca. 1890 and ca. 1900
The Admiralty Palace, St. Petersburg, Russia. Date between ca. 1890 and ca. 1900
RMS Queen Mary - compared in size to Trafalgar SquareThe RMS Queen Mary as she would appear if placed across Trafalgar Square, London. Cunard White Star line. Date: circa 1910s
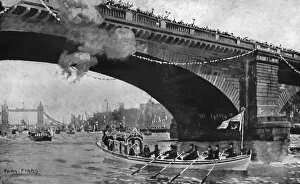
Royal River Pageant, 1919The royal barge passes under London Bridge as part of the river pageant of sea services to mark the fifth anniversary of the start of World War One
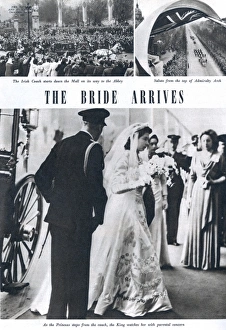
Royal Wedding 1947 - the bride arrivesPage from the Tatler showing scenes of Princess Elizabeth travelling to and arriving at Westminster Abbey for her marriage to Lieutenant Philip Mountbatten on 20 November 1947
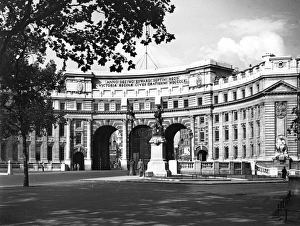
Admiralty Arch 1950SAdmiralty Arch, London, was designed by Aston Webb and completed in 1911. The impressive archways form an entrance to Pall Mall, leading up to Buckingham Palace. Date: 1950s
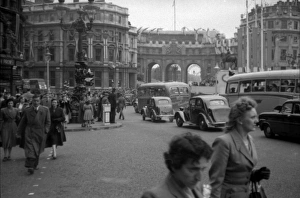
Trafalgar Square and Admiralty ArchTrafalgar Square looking through Admiralty Arch along The Mall. Photograph taken on the day of the 1953 Coronation Derby at Epsom. 6th June 1953
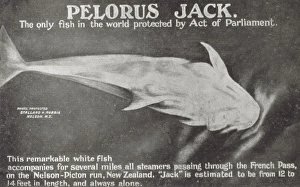
Fish - Pelorus Jack - New ZealandPelorus Jack - a Rissos dolphin that was famous for meeting and escorting ships through a stretch of water in Cook Strait, New Zealand, between 1888 and 1912
Whitehall C18ThBuilt in 1786-8 by Samuel Peyps Cockerall as a residence for the First Lord of the Admiralty Date: 18th century
PALL MALL / 1911Pall Mall, with the new Admiralty Arch in the distance Date: 1911
Victory Parade in LondonA victory parade marches into St James Park along the Mall, which is lined by thousands of people Date: 19 July 1919
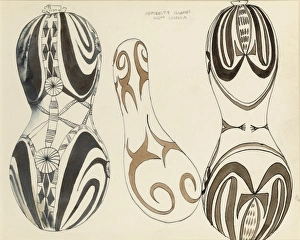
Admiralty Islands - decorated gourdsDecorated gourds from the Admiralty Islands, New Guinea. Pen & Ink with watercolour wash drawings by Raymond Sheppard
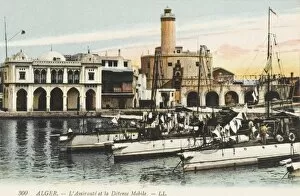
The Admiralty and naval vessels - AlgiersThe Admiralty and elements of the Algerian Navy. The lighthouse can be seen in rear
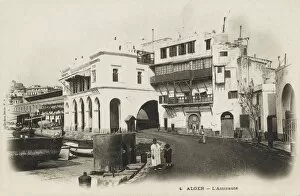
The Admiralty Buildings - Algiers, Algeria
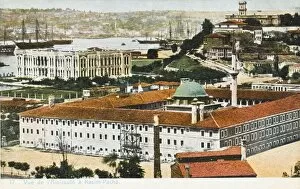
Kasim Pasa - Admiralty BuildingsAdmiralty Buildings at Kasim Pasa - with a small Mosque in the centre of the courtyard
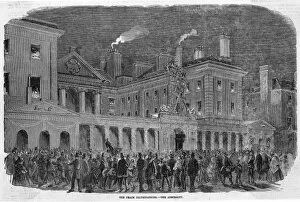
Whitehall IlluminatedThe Admiralty illuminated in celebration of the triumphant conclusion of the war in the Crimea
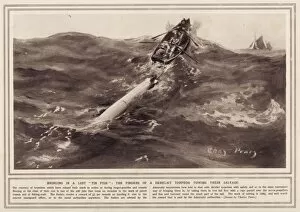
Towed Derelict TorpedoRecovery of a lost torpedo by a fishing boat or patrol vessel. Finders received 5 pounds for salvaging derelict torpedoes and returning them to the Admiralty authorities
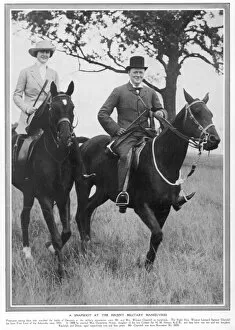
Mr and Mrs Winston ChurchillMr Winston Churchill, First Lord of the Admiralty and Mrs Clementine Churchill on horseback
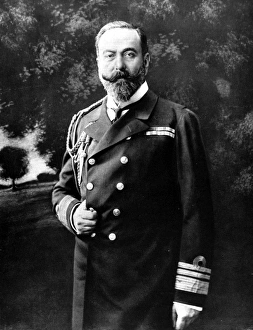
Prince Louis Alexander of Battenberg (1854-1921), photographed in 1912 on succeeding Sir Francis Bridgeman as First Sea Lord of the Admiralty
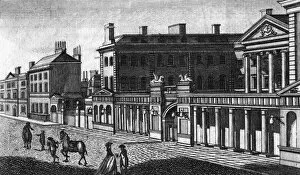
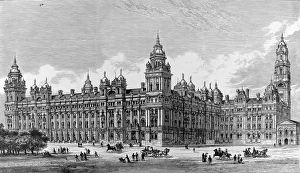
The Admiralty and War Department Offices, London, 1884Engraving showing the exterior of the British Governments Admiralty and War Department Offices, Whitehall, London, 1884
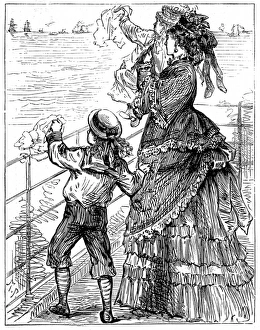
A Young Family waving goodbye to the British Arctic ExpeditiEngraving showing a young mother and two children waving farewell to the ships of the British Arctic Expedition, as they depart
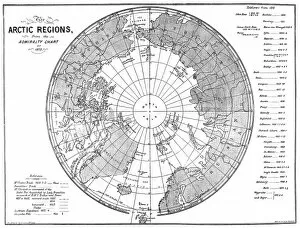
The Admiralty Chart of the Arctic Region, 1875Engraving showing a map of the Arctic region, produced by the British Admiralty in 1875. Although mostly complete, the blank area around the North Pole shows the area that had not yet been visited
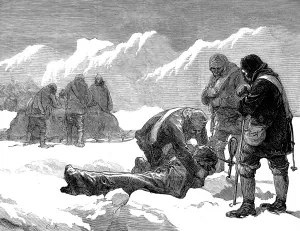
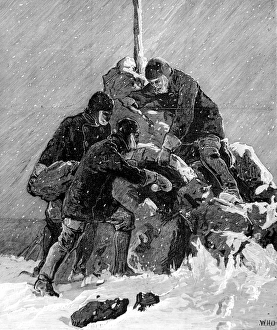
A Funeral in the Ice, British Arctic Expedition, 1875-1876Engraving showing a funeral taking place in the Arctic, during the British Arctic Expedition of 1875-1876. In the summer of 1875 the British Admiralty sent Captain George Nares with two ships
The Crew of HMS Alert Burning Guy Fawkes, November 1875Engraving showing the crew of HMS Alert burning a Guy Fawkes, during the British Arctic Expedition, 5th November 1875. In the summer of 1875 the British Admiralty sent Captain George Nares with two
HMS Alert towing HMS Discovery through Icebergs, BritishEngraving showing HMS Alert towing HMS Discovery through icebergs, with Disco Island in the background, as seen from HMS Valorous (left foreground) during the British Arctic Expedition of 1875-1876
The Crew of the Pandora Recovering Mail from the Cairn onEngraving showing the crew of the ship Pandora recovering mail, left by the British Arctic Expedition of 1875, from the cairn on top of Carey Island
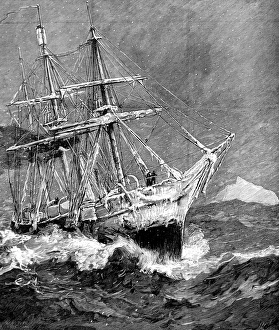
HMS Alert in the North Atlantic, 1876Engraving showing HMS Alert, her bow covered in ice, heading home to Great Britian at the end of the 1875-1876 Arctic Expedition
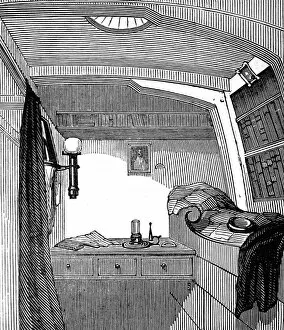
Captain James Fitzjamess Cabin aboard HMS Erebus, 1845Engraving showing Captain James Fitzjamess cabin aboard HMS Erebus, pictured shortly before departure, 1845. In 1845 the British Admiralty sent two polar exploration ships, HMS Erebus and HMS Terror
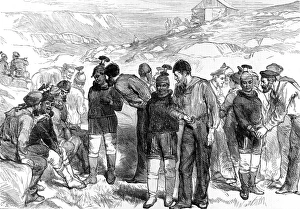
British Sailors meeting Greenland Women, Disco Island, 1875Engraving showing the scene as the Royal Navy sailors, of the British Arctic Expedition, attempt to charm some of the female inhabitants of Greenland, 1875
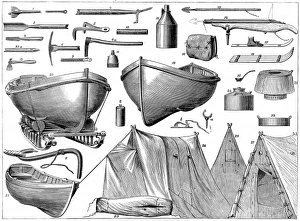
Equipment used in the British Arctic Expedition, 1875-1876Engraving showing a variety of equipment used during the British Arctic Expedition of 1875-1876. Tents, small boats, cooking utensils and various cutting implements can be seen
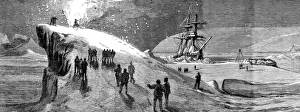
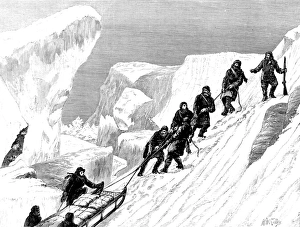
Sledge Hauling, British Arctic Expedition, 1875-1876Engraving showing a sledging party hauling their load up a steep incline to reach a depot at Cape Rawson, British Arctic Expedition of 1875-1876
HMS Alert caught in ice off Cape Beechey, 1875-1876Engraving showing HMS Alert caught in the ice, against the shore of Cape Beechey during the 1875-1876 British Arctic Expedition
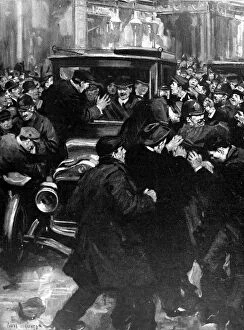
Anti Home-Rulers attacking Winston Churchills car, BelfastIllustration showing a crowd of anti home-rulers attacking the car carrying Winston Leonard Spencer Churcill (1874-1965), then First Lord of the Admiralty
The Western Sledge Party of the British Arctic Expedition, 1Engraving showing Western sledging party setting out from HMS Alert to explore the coast of Ellesmere Island, April 1876. Led by Lieutenant Aldrich this party explored 220 miles of the northern shore
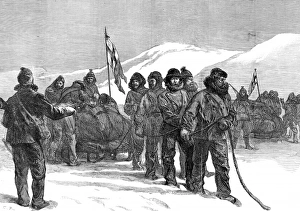
Sledging Party on the British Arctic Expedition, 1875-1876Engraving showing a sledging party making an overland journey between HMS Alert and HMS Discovery during the British Arctic Expedition of 1875-1876
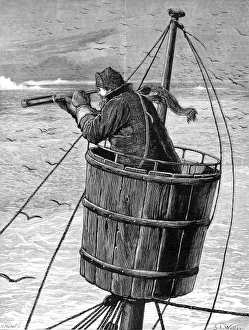
The Look-Out or Crows Nest, British Arctic Expedition, 18Engraving showing the Look-out or Crows Nest at the top of the mainmast of one of the ships of the British Arctic Expedition, 1875-1876