mail_outline sales@mediastorehouse.com
Shipping bullocks to Cape Coast Castle, 1874Shipping bullocks from Sierra Leone for Cape Coast Castle during the British expedition to crush the King of the Ashantis in the 2nd Ashanti War (1873-74)
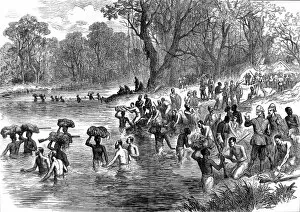
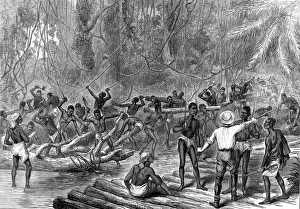
The Ashanti War (1873-74) - Native carriers crossing mangrovThis shows the difficulties of the native bearers as they tried to cross the mangroves on the river banks of the river Prah
The Ashanti War (1873-74) The return from Kumasi, 1874The return of the British and native troops from their expedition to Kumasi. They are seen here crossing a river. This was sketched during the 2nd Ashanti War (1873-74)
Inner courtyard of King of Ashantis palace, 1874The inner courtyard of the King of Ashantis palace captured by the British during the 2nd Ashanti War (1873-74). In 1873, after decades of an uneasy relationship between the British
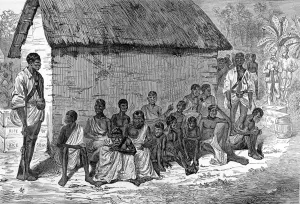
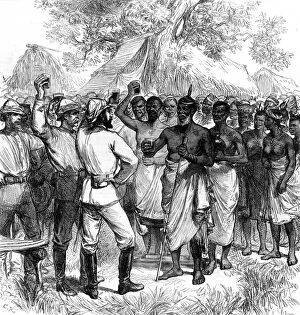
The Ashanti War (1873-74) - Ashanti prisoners of warAshanti prisoners of war huddled next to a hut being guarded by native soldiers. Two British officers are in the background
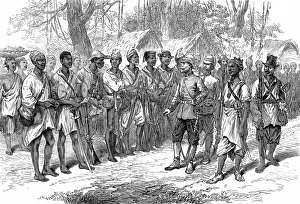
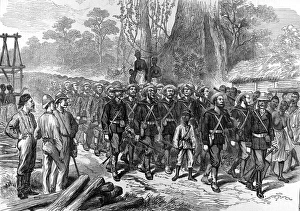
The Ashanti War (1873-74) - Inspecting troops at PrahsuBritish officers inspecting Kossohs, or warriors from a tribe hostile to the Ashanti, at the British camp based at Prahsu
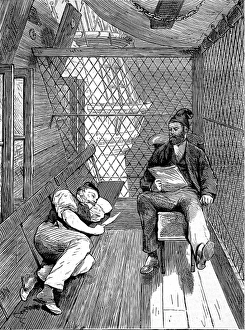
The Ashanti War (1873-74) - On board hospital shipThe so-called bird cage walk. On board the hospital ship Victor Emmanuel. Two invalids read while recuperating during the Ashanti expedition
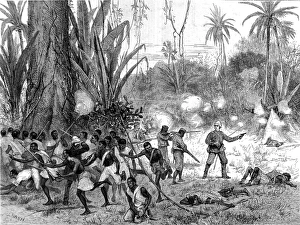
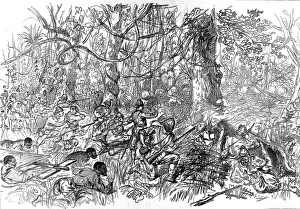
The Ashanti War (1873-74) - a bush fightThe Ashanti and British engaged in a bush fight in the jungle with fireamrs. The Ashanti War fought between, 1873-74, was fought between King Asantehene
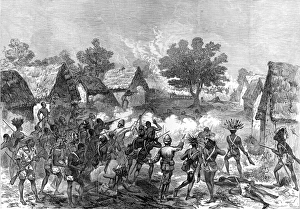
The Ashanti War (1873-74) - Storming a villageLord Gifford and advance scouts. using guns, storm a village during their advance on the Ashanti. The second Ashanti War fought between, 1873-74, was between King Kofi Karikari
The Ashanti War (1873-74) - Naval Brigade in KumasiThe Naval Brigade clearing the streets of Kumasi (Coomassie) the capital of the Ashanti. The second Ashanti War fought between, 1873-74, was between King Kofi Karikari
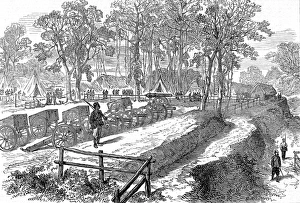
The Ashanti War (1873-74) - Artillery park in PrahsuThe artillery park in the British camp at Prahsu. The second Ashanti War fought between, 1873-74, was between King Kofi Karikari, ruler of the Ashanti (or Asantehene), and the British
The Ashanti War (1873-74) - Sir Wolseley receives news fromSir Garnet Wolseley surrounded by British and native soliders and bearers receives news from the front in the war against the Ashanti
The Ashanti War (1873-74) - Sir Garnet Wolseley returns homeSir Garnet Wolseley returns to England from the Ashanti expedition. He lands at Portsmouth and is seen here raising his hat and shaking hands
The Ashanti War (1873-74) - Sir Wolseley entering KumasiSir Garnet Wolseley entering Kumasi (Coomassie), capital of the Ashanti during its brief capture by the British and native troops
The Ashanti War (1873-74) - Arrival of the Naval Brigade atArrival of the Naval Brigade in camp at Prahsu (on the river Prah, which had to be crossed to reach the coast). The second Ashanti War fought between, 1873-74, was between King Kofi Karikari
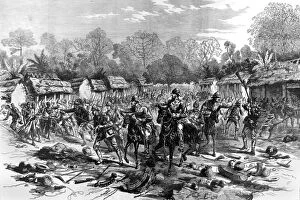
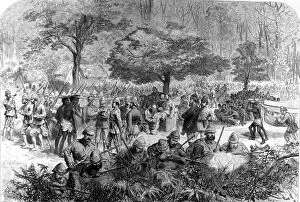
The Ashanti War (1873-74) - British headquarters at AmoafulThe British headquarters, with British officers and native soldiers, at the Battle of Amoaful. The second Ashanti War fought between, 1873-74, was between King Kofi Karikari
The Ashanti War (1873-74) - Advancing on KumasiThe British and native soldiers advancing on Kumasi (Coomassie). The second Ashanti War fought between, 1873-74, was between King Kofi Karikari, ruler of the Ashanti (or Asantehene), and the British
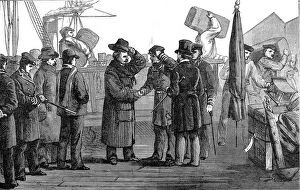
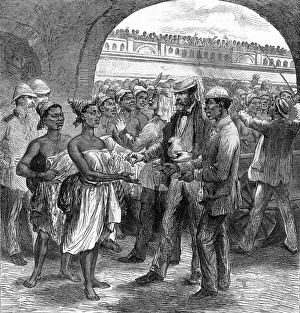
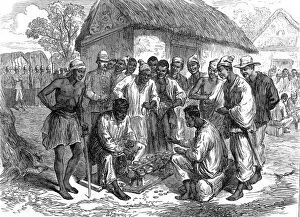
The Ashanti War (1873-74) - paying woman portersHere women porters or carriers from the Fante tribe (under British protection) are being paid at Cape Coast Castle. The second Ashanti War fought between, 1873-74, was between King Kofi Karikari
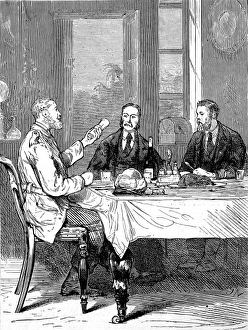
The Ashanti War (1873-74) - Dinner at Cape Coast CastleOfficers having returned from the bush enjoy a civilised meal at Cape Coast Castle during the expedition to defeat the Ashanti
The Ashanti War (1873-74) - making a road to KumasiBritish overseer giving instructions to tribesmen who are cutting down trees and making a road to the Ashanti capital, Kumasi
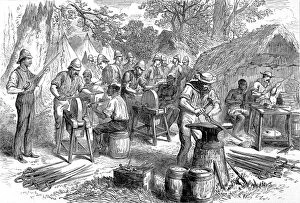
The Ashanti War (1873-74) - Sharpening cutlasses at PrahsuThe British contingent at camp in Prahsu making preparations for war, sharpening cutlasses. The second Ashanti War fought between, 1873-74, was between King Kofi Karikari
The Ashanti War (1873-74) - Native soldiers recreationNative soldiers playing at warry during a lull in hostilities. The second Ashanti War fought between, 1873-74, was between King Kofi Karikari, ruler of the Ashanti (or Asantehene), and the British
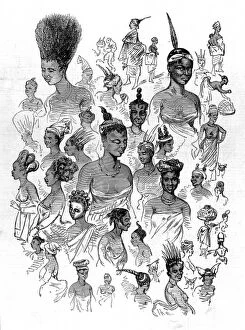
Female fashions at Cape Coast Castle - The 2nd Ashanti WarNative female fashions at Cape Coast Castle, garrison and headquarters of the British colonialists till 1877. This sketch was made during the second Ashanti War
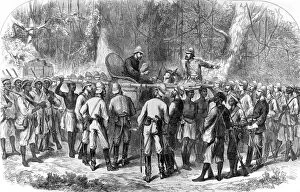
The Ashanti War (1873-74) - Lord Gifford and scouts on the ALord Gifford and advance scouts on the Adansi hills being warned by an Ashanti priest not to go forward. The second Ashanti War fought between, 1873-74, was between King Kofi Karikari
The Ashanti War (1873-74) - The Black Watch in actionThe Black Watch fighting in the forest of Ashanti, from the picture by Louis Desanges. The second Ashanti War fought between, 1873-74, was between King Kofi Karikari
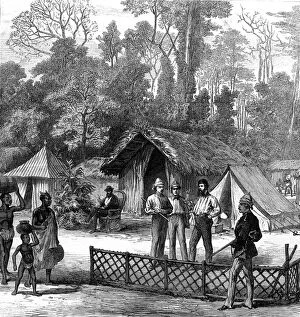
The Ashanti War (1873-74) - Correspondents Quarters at PrahNewspaper correspondents quarters in the camp at Prahsu. The man seated is the Times correspondent. Of the three men standing together represent, from left to right, the New York Herald
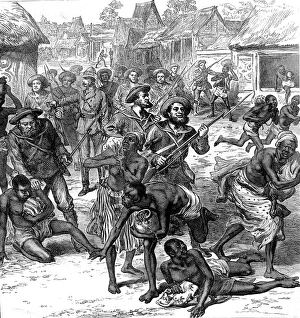
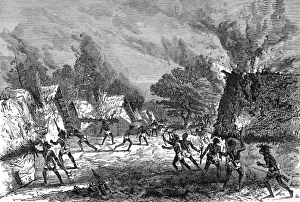
The Ashanti War (1873-74) - Setting fire to a villageLord Giffords scouts setting fire to a village and destroying houses during their advance on the Ashanti. The second Ashanti War fought between, 1873-74, was between King Kofi Karikari
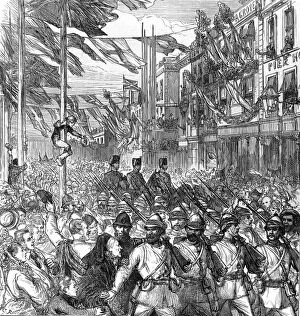
The Ashanti War (1873-74) - British forces arrive homeArrival of the 23rd Royal Welsh Fusiliers at Portsmouth from the Ashanti expedition. The second Ashanti War fought between, 1873-74, was between King Kofi Karikari
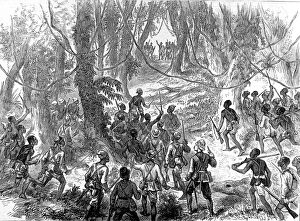
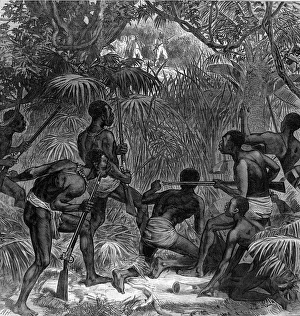
The Ashanti War (1873-74) - Ashantis in ambushAshanti people in ambush in the jungle during the British expedition to secure the West Coast of Africa from the King of the Ashanti people
The Ashanti War (1873-74) - Special Artist and native chiefThe Illustrated London News Special Artist drinking to the Queens health with the Abrakrampa Native Chief. The second Ashanti War fought between, 1873-74, was between King Kofi Karikari
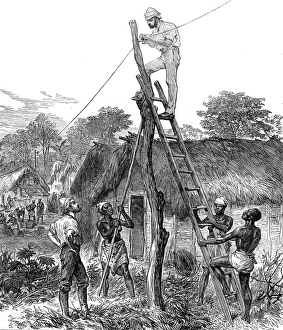
The Ashanti War (1873-74) - fixing telegraph wiresFixing telegraph wires on the road to the Prah river. The Ashanti warriors had crossed this river to reach the coast where they tried to maintain a stronghold
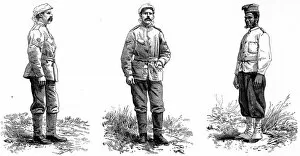
The Ashanti War (1873-74) - Uniform for the soldiers of theThese illustrations show the uniforms for the soldiers sent on the expedition to defeat the Ashanti King and secure the West Coast of Africa
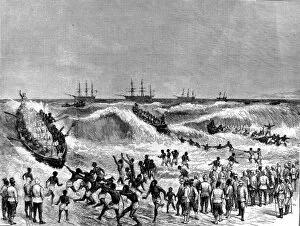
The Ashanti War (1873-74) - Landing troops on the Gold CoastBritish troops landing on the Gold Coast in their expedition against the Ashanti people to secure the West Coast of Africa
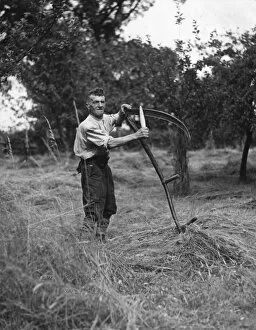
Sharpening a ScytheSam Bennett of Ilmington, Warwickshire, England, aged 74, who has used a scythe for 52 years and can still mow one and a quarter acres a day!
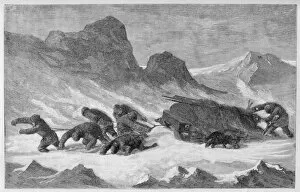
Payer / Sledge Party / 1873A sledge party making a difficult journey
Payer / Tegetthoff / 1874Payer abandons the ice-crushed Tegetthoff and the crew set out for Novaya Zemlya with sledges and three boats
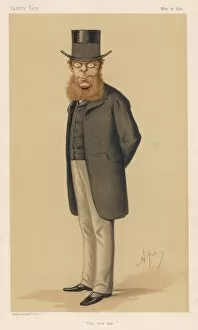
Ra Cross / Ape / Van Fair 74Richard Assheton Cross 1st Viscount Cross Conservative Mp
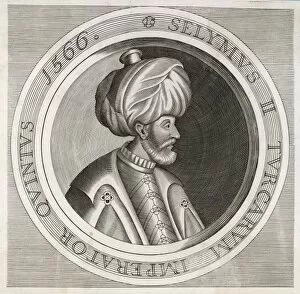
Selim Ii / Turkey / KnolleSELIM II called SARI or THE BLONDE or THE SOT Sultan of Turkey (1566-74)
Selim Ii / Turkey / MassonSELIM II called SARI or THE BLONDE or THE SOT Sultan of Turkey (1566-74)
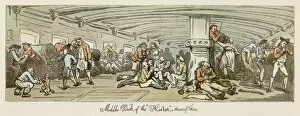
Below Decks 1782The middle deck of the 74-gun warship Hector : note the presence of women and dogs
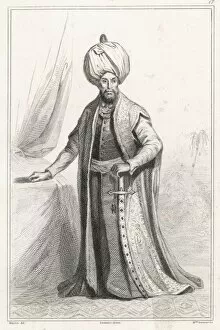
Jean-Baptiste TavernierJEAN-BAPTISTE TAVERNIER French traveller in Turkey, Persia, central Asia and the East Indies, depicted at the age of 74